Blog

Make Your Holiday Cards with Apple’s Photos App
It’s that time of year again, when we realize that if we’re going to do holiday cards, we should get started. You can take the easy way out and buy a few packs of generic reindeer cards at the drugstore, but with a little work in Apple’s Photos app on the Mac, you can instead send cards personalized with your favorite family photos from the past year. Here’s how.
- Select photos. Although you can add photos to your card project at any time, it’s easiest to make a new album and then spin through last year’s photos, adding 20 or so of the best candidates to your album. Don’t be picky at this point because it’s easier to choose the final images from within the card layout.
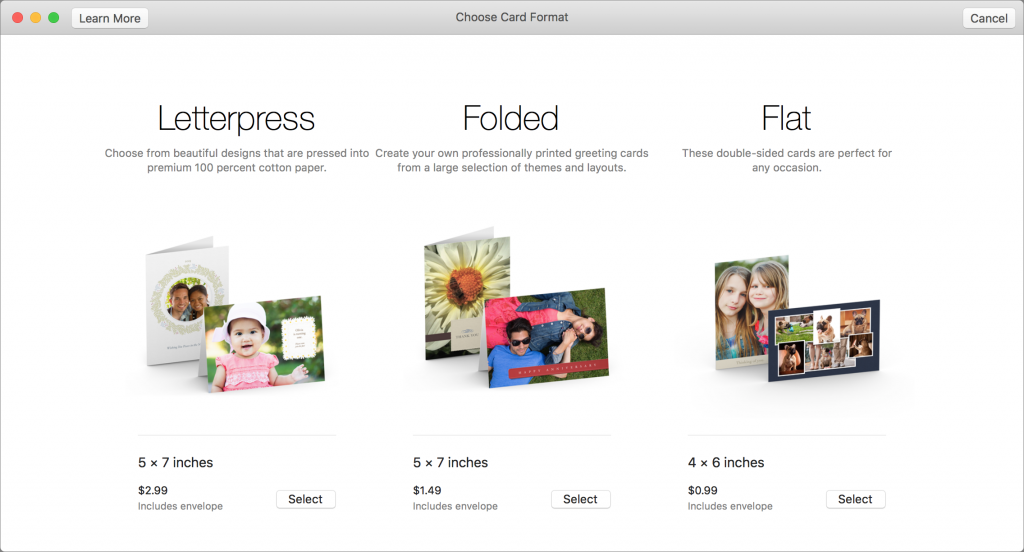
- Create the card. Select all the photos in your new album with Edit > Select All, and choose File > Create > Card. Then select one of the three choices: a 5×7 folded letterpress card for $2.99 each, a 5×7 folded card for $1.49 each, or a 4×6 flat double-sided card for $0.99 each. They all include envelopes.
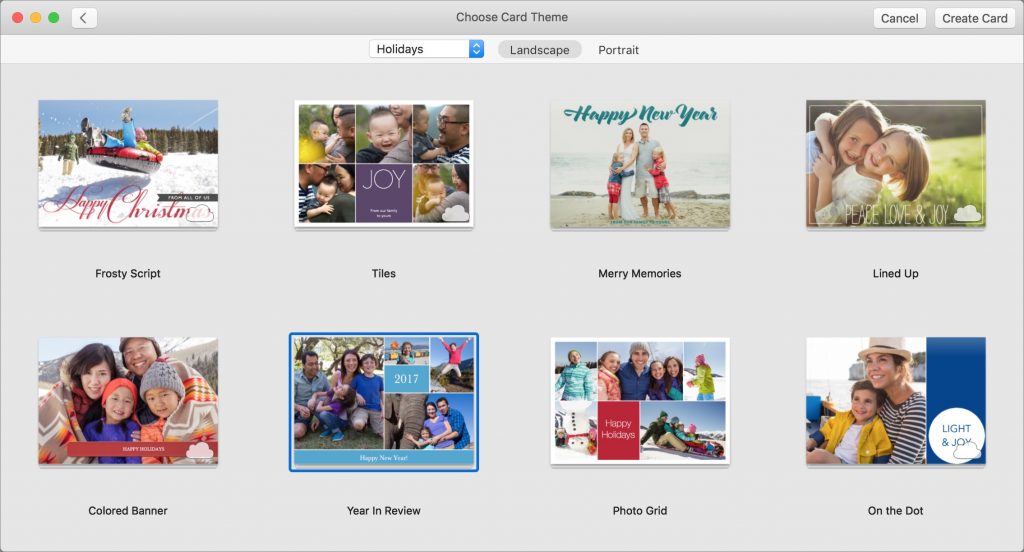
- Select a theme. Photos loads themes over the Internet automatically, so if you see just a few themes, wait until more appear. Choose Holidays from the pop-up menu at the top, and click either Landscape or Portrait to pick the orientation before selecting a theme and clicking Create Card in the upper-right corner.
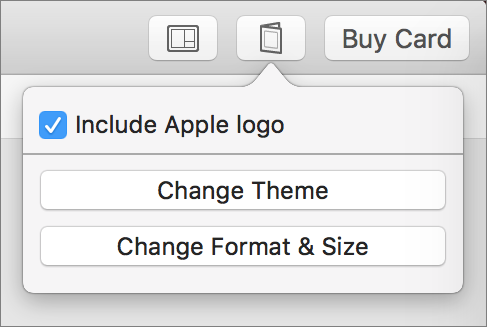
It’s easy to change your choices while working on the card by clicking the button next to Buy Card.
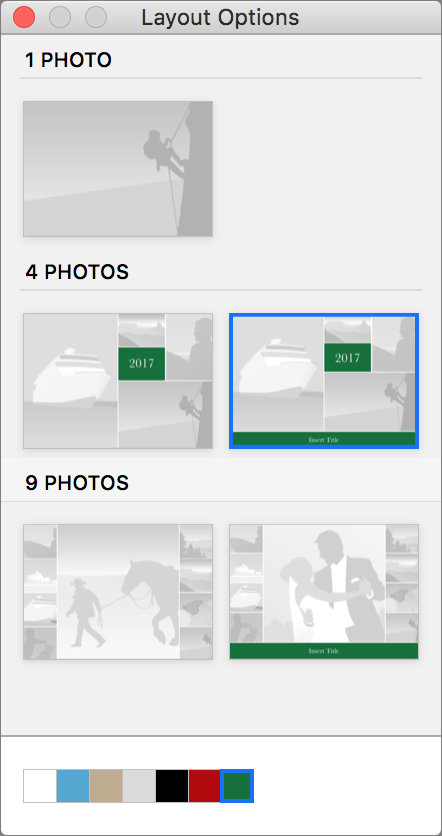
- Choose layouts. Although every card starts with a default layout, most have alternatives. Would you prefer a single image on the front, rather than a four-photo layout? Click the Options button below the card to open the Layout Options panel, and click the desired layout.
- Add photos. To add a photo to a spot on the card, drag it from the photo collection at the bottom of the screen, which shows the contents of your album. Dragging a photo on top of an already-placed image replaces it, or you can drag a photo from the card back to the collection at the bottom. Buttons let you clear placed photos (helpful when starting over with a new theme), auto-fill photos for quick placement, switch between showing unused and placed photos, and add more photos to the project.
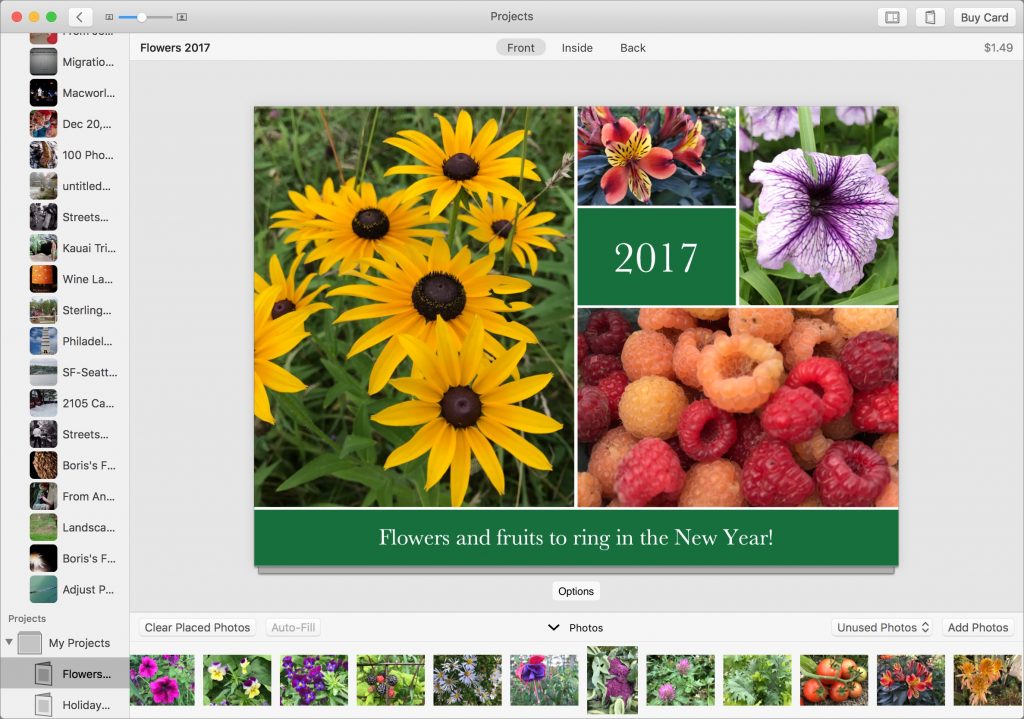
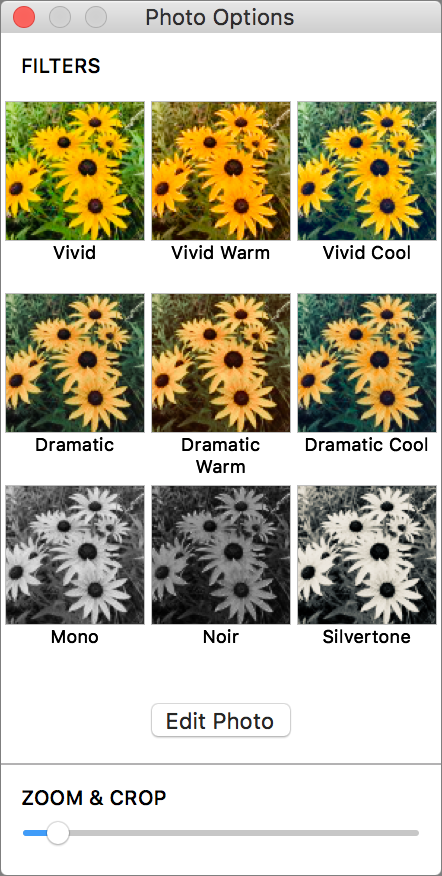
If Photos didn’t bring in all the photos from your album automatically, click the album in the sidebar, select all the photos, and drag them to the project entry in the sidebar. That’s much easier than adding them piecemeal via the Add Photos button. - Edit photos. When you click a photo on the card, the Photo Options panel appears so you can apply filters, edit the photo with all of Photos’ editing tools, or zoom and crop. After zooming a photo with the slider, you can drag it within its spot on the card to position the subject properly.
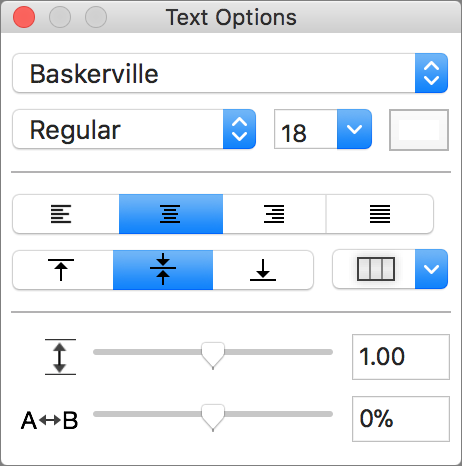
- Add and edit text. Some text boxes in the layout can be edited; just click inside and type. Others can’t be changed. If you need to tweak the font, size, color, or orientation of text, select it and make your adjustments in the Text Options panel that appears.
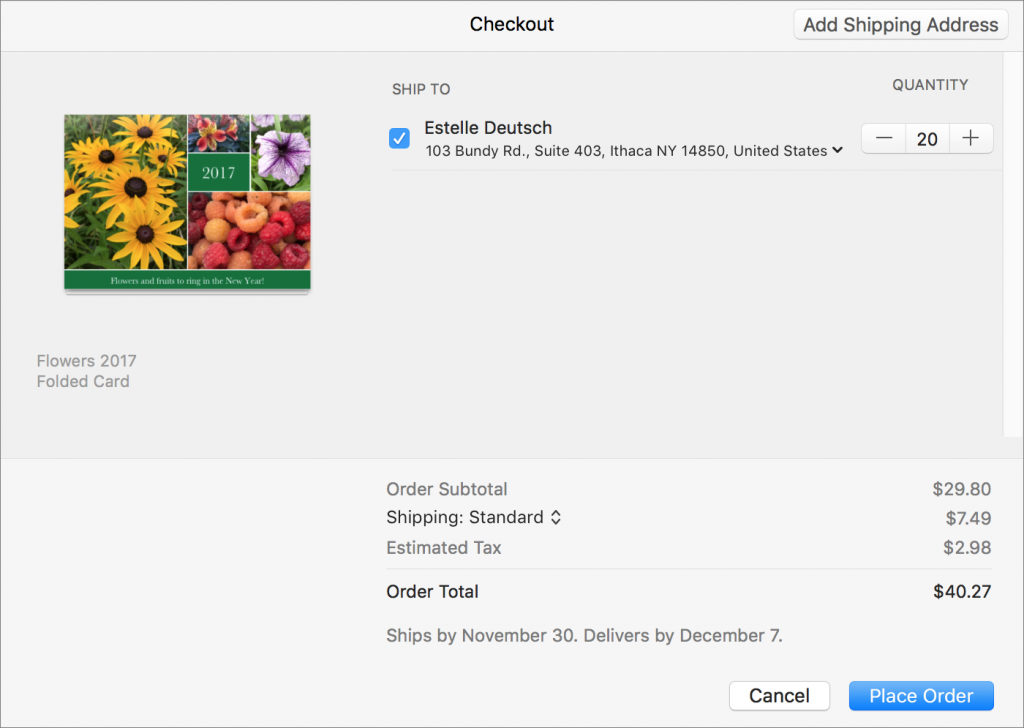
- Buy your card. Once you’ve adjusted everything to your liking, click the Buy Card button in the upper-right corner of the window. Click Add Shipping Address, select a contact (likely yourself) to send the cards to, and then enter how many cards you’d like. When you’re done, click Place Order.
Apple prints and mails you the cards, usually within a week or so. The print quality is, as you’d expect from Apple, top notch, and overall, the cards are a step up from those available from other photo services.
The hardest part of designing your own cards with Photos is figuring out which themes and layouts best match the photos you want to share. Some themes offer spots for only one or two photos, whereas others let you include a lot more, at the cost of making them much smaller. Similarly, some themes let you write a full letter, but others have room for just a few words of holiday cheer.
When you have a few minutes, sit down with a cup of eggnog and play with Photos’ card-making capabilities. Stay tuned, since we have another article about how to print labels for your cards coming soon!
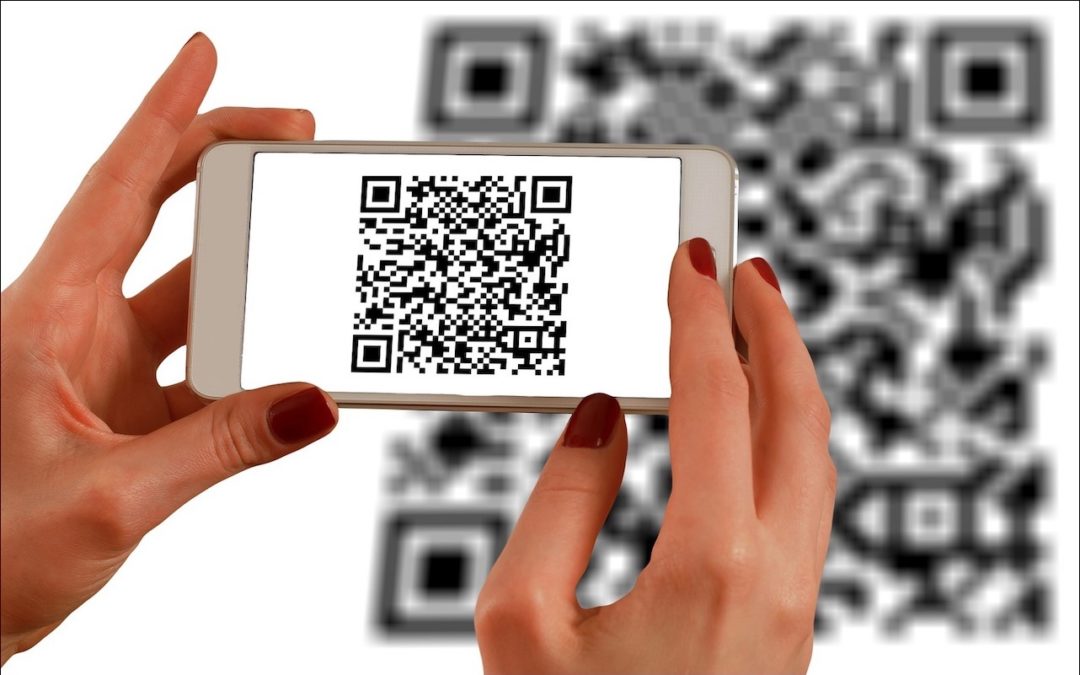
Tip of the Day: Scan QR Codes with the Camera in iOS 11
You’ve undoubtedly seen those odd-looking square QR codes on product packaging, a business card, or a flyer. In the past, you needed a special app to scan a QR code to see what Web URL, contact card, Wi-Fi network, or other piece of information it held. In iOS 11, though, you can just point your iPhone or iPad camera at a QR code—no need to take a picture! Then tap the notification that appears at the top of the screen to display whatever data was encoded by the QR code.


Holiday Photos Simplified: An Easier Method of Flipping between iPhone Camera Modes
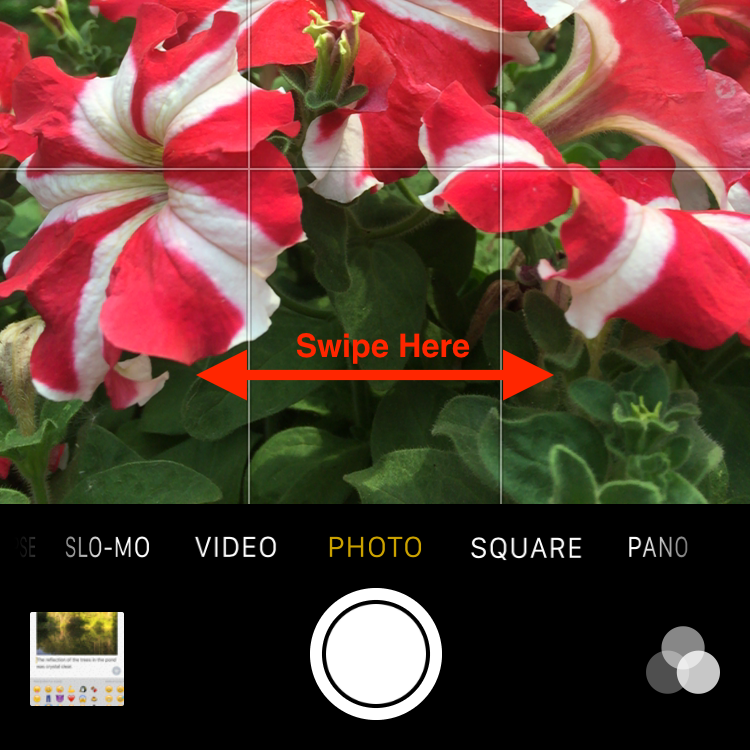
The Camera app on the iPad, iPhone, and iPod touch can take three kinds of video and three types of photos, and the interface suggests that you switch between them by tapping or swiping on the labels below the viewfinder. Unfortunately, those labels are small and can be difficult to swipe accurately. If you’ve found moving between modes frustrating, try swiping left or right on the entire viewfinder, which has the same effect as swiping on the labels but with a much larger swipe area. And, if your Camera app occasionally takes an unexpected type of photo, an errant swipe could explain it.
Multitasking in iOS 11 on an iPad
With iOS 11, the iPhone and iPad interfaces continue to diverge, which makes sense, since the iPad is not merely an overgrown iPhone. Particularly when you pair an iPad Pro with a Smart Keyboard and Apple Pencil, you can now get real work done on an iPad more fluidly than ever before. The “hard†part is learning how you switch between apps, display a second app in a Slide Over panel that floats on top of another app, or make two apps share the screen in Split View.
Switch Between Apps
Moving between apps is a key aspect of using the iPad. Apple has provided multiple ways to switch so you can pick those that best fit your style:
- Press the Home button, and on the Home screen, tap another app’s icon.
- On the Home screen, swipe down to show Siri app suggestions and search for another app.
- Within an app, swipe right or left with four fingers.
- Within an app, swipe up from below the bottom of the screen to reveal the new Dock, and then tap an icon on it. Note that the three rightmost icons are the most recently used apps.
- After revealing the Dock, keep swiping up to reveal the new app switching screen, then tap an app thumbnail to switch to it. Swipe right to see less recently used apps.
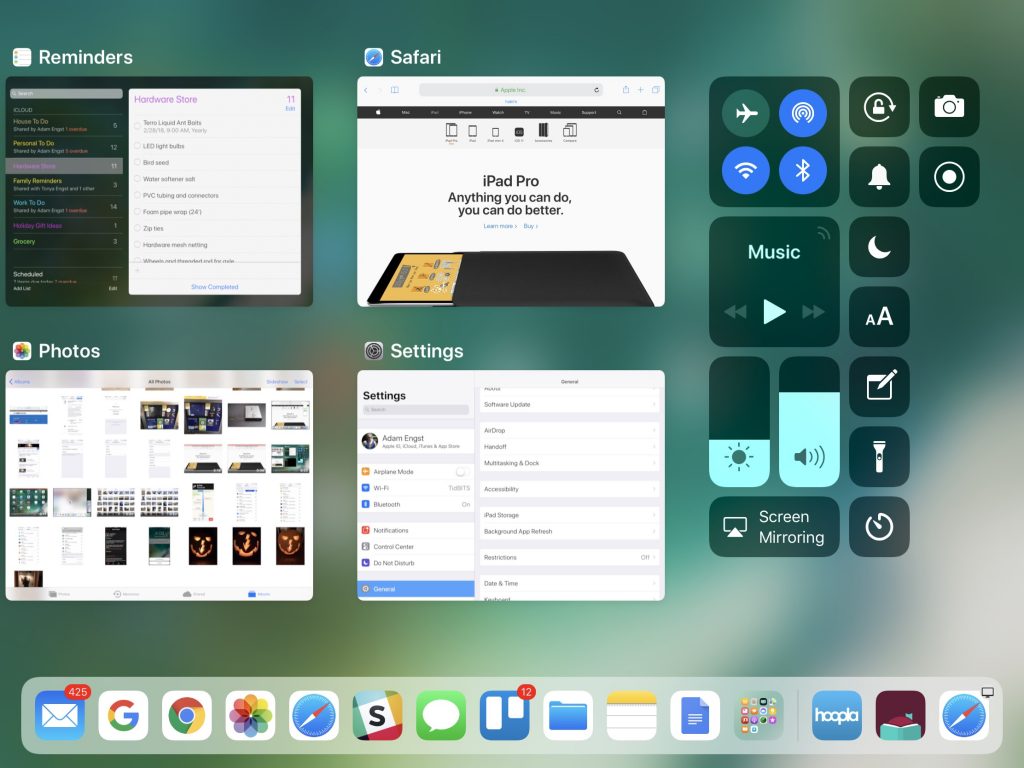
- From a Smart Keyboard or other keyboard, press Command-Tab to bring up a Mac-like app switcher. Release both keys quickly to switch to the previous app instantly, or keep Command down while you press Tab repeatedly to move sequentially among the shown apps, letting up on Command to switch. While the app switcher is shown, you can also tap an icon in it.
Display an App in Slide Over
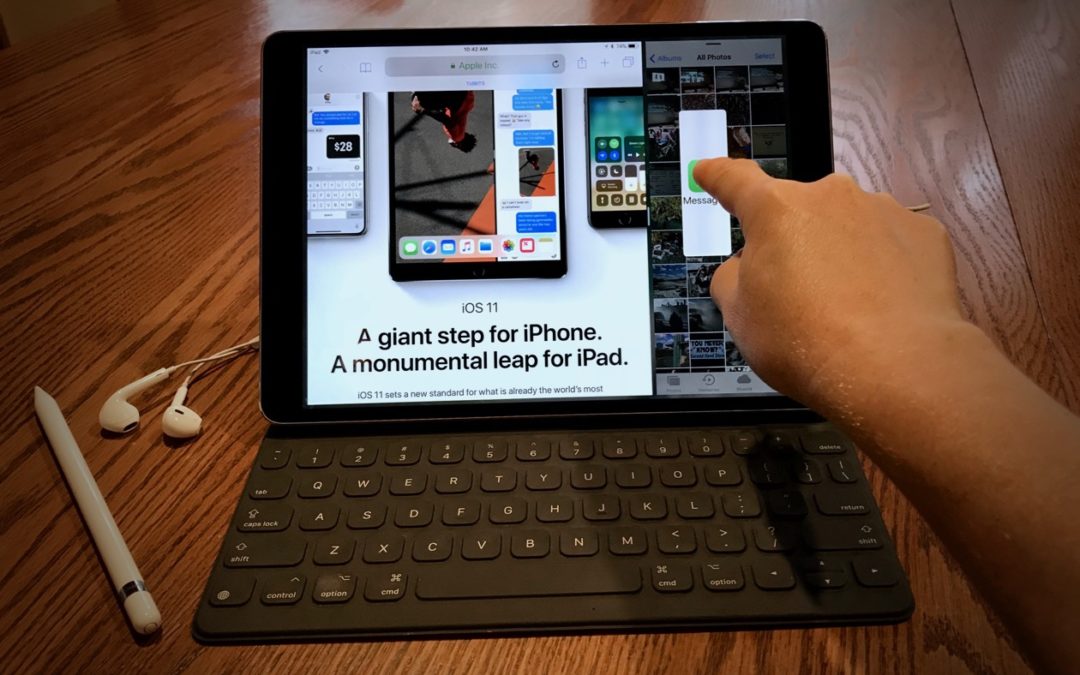
Say you’re having a sporadic conversation in Messages while browsing the Web in Safari. You don’t need to see both apps all the time, but you also don’t want to have to switch back and forth. With Slide Over, you can put Messages in a panel that floats over Safari and then hide and show it.
The easiest way to put an app in a Slide Over panel is to use the Dock, so this technique works if the app’s icon is already on the Dock. For instance, while you’re in Safari, swipe up from the bottom of the screen to display the Dock. Then touch and hold the Messages app’s icon until it dims slightly. Keeping your finger down, drag the icon over Safari until it becomes a vertical lozenge. Lift your finger, and Messages appears in Slide Over.
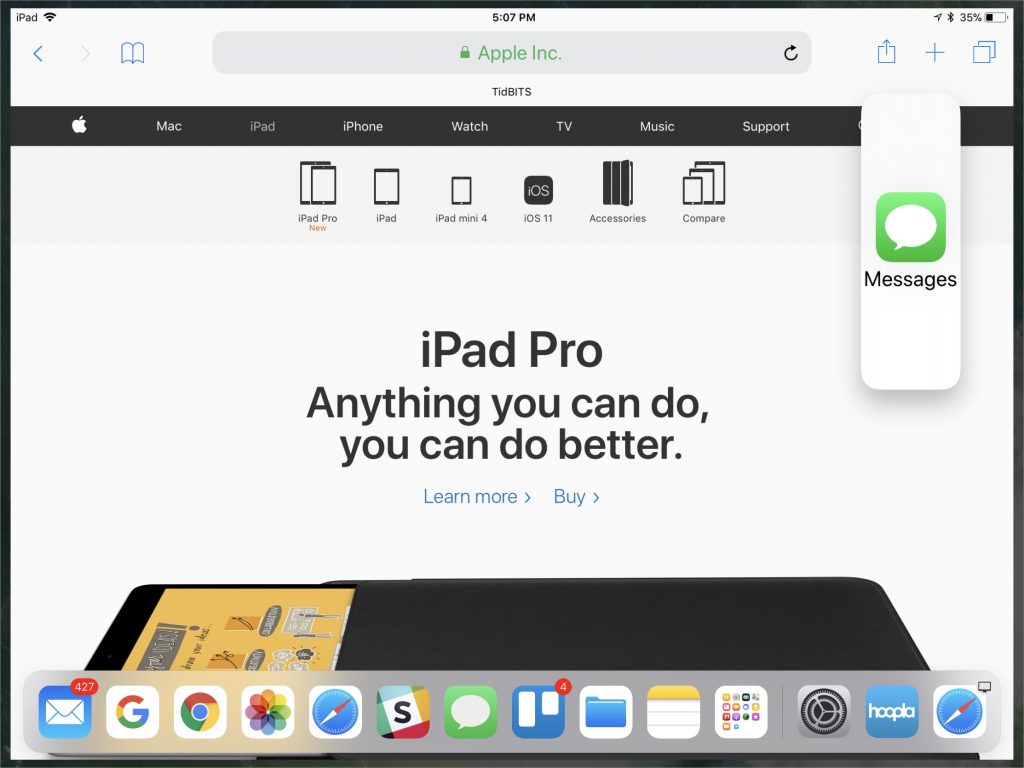
If the app you want to put in Slide Over isn’t on your Dock, you can use a two-handed procedure to get it from another location and drop it onto another app. For instance, you can start dragging an app icon from any place where app icons appear, including the Home screen or Siri search screen. Once you’ve started dragging it, use your other hand to switch to the other app (perhaps via the Dock or pressing Command-Tab on an external keyboard) and then drop it over the other app. Don’t worry if you find this approach confusing at first—it takes some time to become accustomed to two-handed usage.
Once an app is in Slide Over on the right side of the screen, you can swipe right on its left edge to hide it, or swipe left on its right edge to move it to the other side of the screen.
Put an App in Split View
Displaying two apps side-by-side in Split View is almost the same action as Slide Over. The only difference is that, instead of dropping the app lozenge on top of the current app, you drag it to the far left or right of the screen, and drop it once the screen shows a 90/10 split—after you drop, the split changes to 70/30.
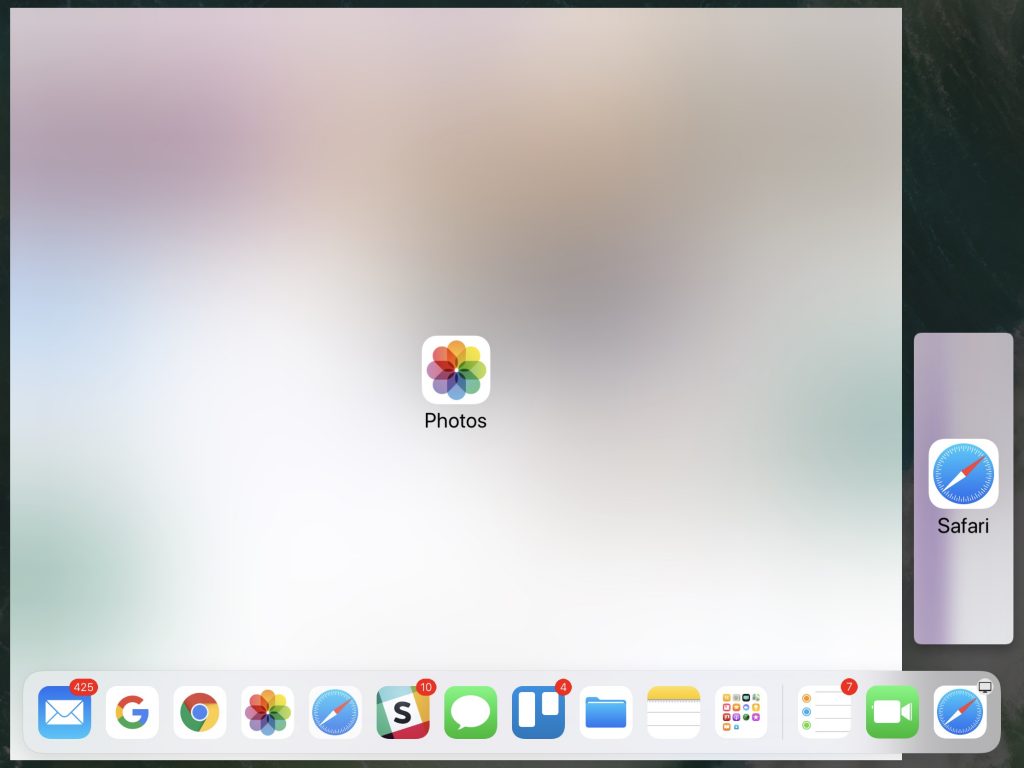
Drag the handle between the apps to switch to a 50/50 split or a 30/70 split; if you drag the handle all the way to one side of the screen, the app that’s shrinking in size disappears entirely. One of the two apps in Split View will have a handle on its top as well, and dragging it down slightly converts that app into a Slide Over panel. (You can also drag a Slide Over panel’s handle down slightly to switch to Split View.)
Take a few minutes and try putting apps in Slide Over and Split View in different ways, since some of the actions require practice before they feel natural. Finally, if combining two particular apps doesn’t seem to work, don’t fret. Apps must specifically support both Slide Over and Split View, and not all do.
The Best Apple-Related Gifts for 2017
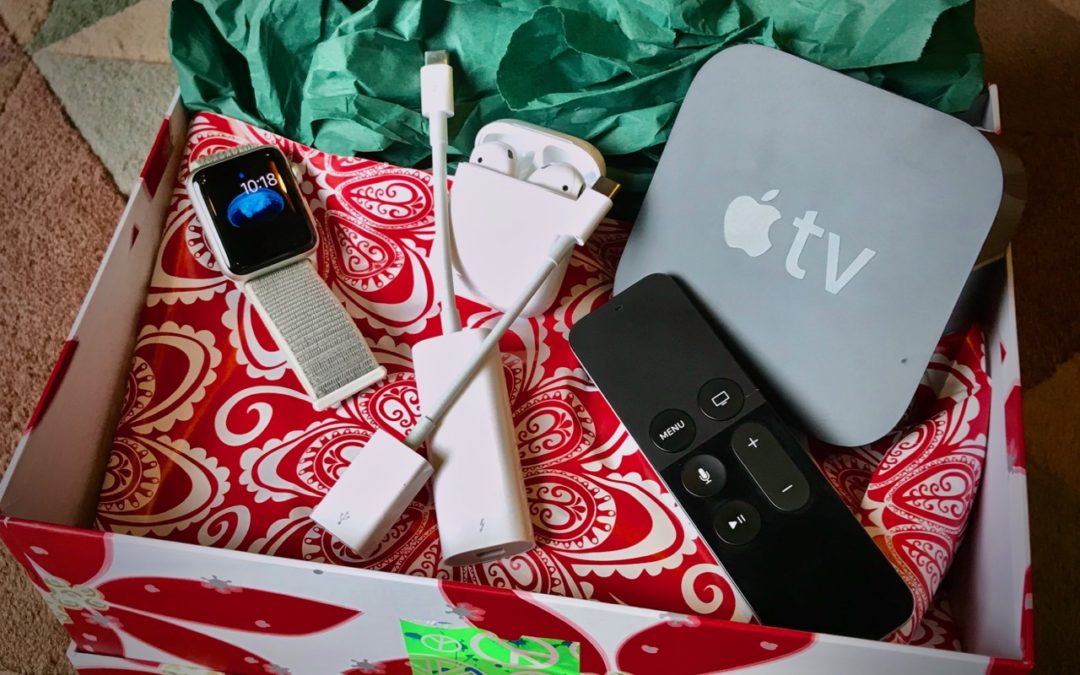
It’s that time of year again, when many of us start wracking our brains for gift ideas for our loved ones—or for our own wish lists. If your special someone is an Apple user, we have a few gift suggestions that we think you’re going to love.
Chargers, Cables, and Adapters, Oh My!
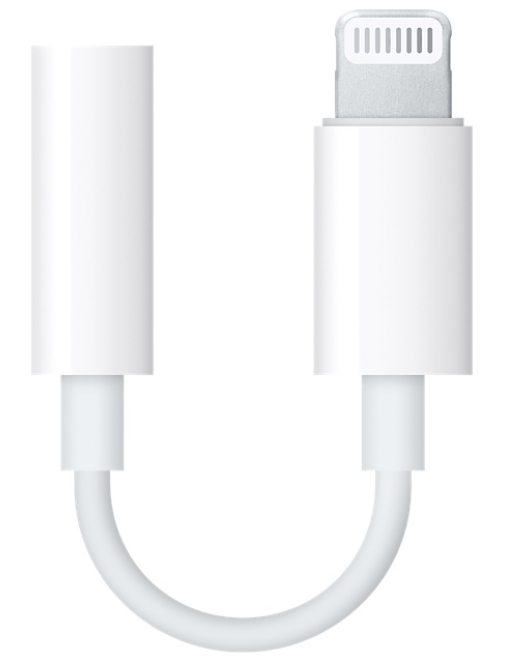 We know that giving someone a cable feels a bit like buying them socks, but Apple’s minimalist design and focus on USB-C and Lightning ports means that many users would appreciate extra cables or adapters. You’ll want to ask them what they find most annoying about their current cable situation—they might want an extra Lightning to headphone adapter, a USB-C to USB-A cable for connecting some peripheral, or an HDMI cable to run a big-screen TV.
Plus, giving someone a second iPhone, Mac, or Apple Watch charger could reduce battery anxiety or make it less likely that they’d forget to pack one while traveling. It’s never a bad idea to have an extra charger on hand. We keep our extras in our cars, suitcases, and backpacks just in case!
AirPods
 Apple’s most surprising hit of 2017 was the AirPods, svelte wireless earbuds that pair quickly and seamlessly to all Apple devices logged in to the same iCloud account. They’re light, stay in the ear well, and are comfortable even for many people who couldn’t wear the wired EarPods. At $159, they’re not cheap, but they’re still less expensive than many competing wireless earbuds.
The only catch? Apple has had trouble making AirPods fast enough, so don’t assume you can buy a pair as a last-minute gift. Plan ahead for this gift!
Apple Watch
 Apple always intended the Apple Watch as an iPhone accessory, so it makes a great add-on for any iPhone user who doesn’t already have their iPhone in hand most of the day. For most people, the $249 Apple Watch Series 1 is a fine gift, although the $329 Series 3 is faster and brighter, and doesn’t need the iPhone to track a run or bike ride via GPS.
Consider the $399 Series 3 with cellular access only if you’re certain the recipient will make use of the watch while out and about without the iPhone, since its data plan costs $10 extra per month.
And, if someone on your gift list already has an Apple Watch, a new band might make a great present—Apple offers a wide variety of attractive and comfortable bands.
Apple TV
 Although it’s a few years old, the $149 fourth-generation Apple TV still makes a good present for anyone who watches TV shows and movies from Netflix, iTunes, Hulu, and other Internet streaming video services.
For most people, the $179 Apple TV 4K is overkill, since its support for 4K video and HDR color require a compatible 4K HDR TV purchased in the last year or so.
So stick with the previous Apple TV, and if you’re looking for a related stocking stuffer, search for silicone cases that protect the brittle Siri Remote and make it easier to orient in the dark.
iPad
Last, but far from least, if someone in your family has never tried an iPad or is limping along with one of the early models, the current fifth-generation iPad combines good performance and a gorgeous screen with a compellingly low price starting at $329.
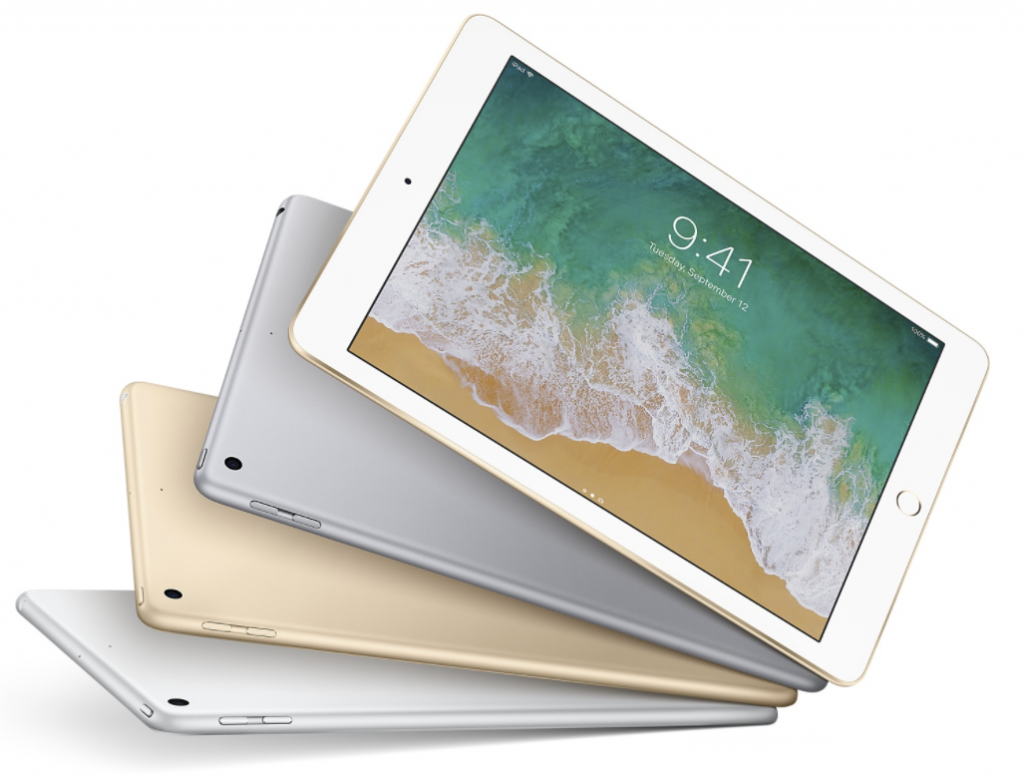
At $399, the smaller iPad mini 4 doesn’t provide as much bang for the buck, but it could be the perfect present for a child.
Particularly when buying an iPad for a kid, a durable case is a must—perhaps suggest that as a gift idea to another family member.

Stop Paying Too Much for your Family’s iCloud Drive Storage
Apple gives iCloud users 5 GB of free storage, but that fills up fast with iCloud Photo Library, iOS backups, iBooks, and other files and items. Until iOS 11 and macOS 10.13 High Sierra, each person in a family had to buy extra iCloud space separately.
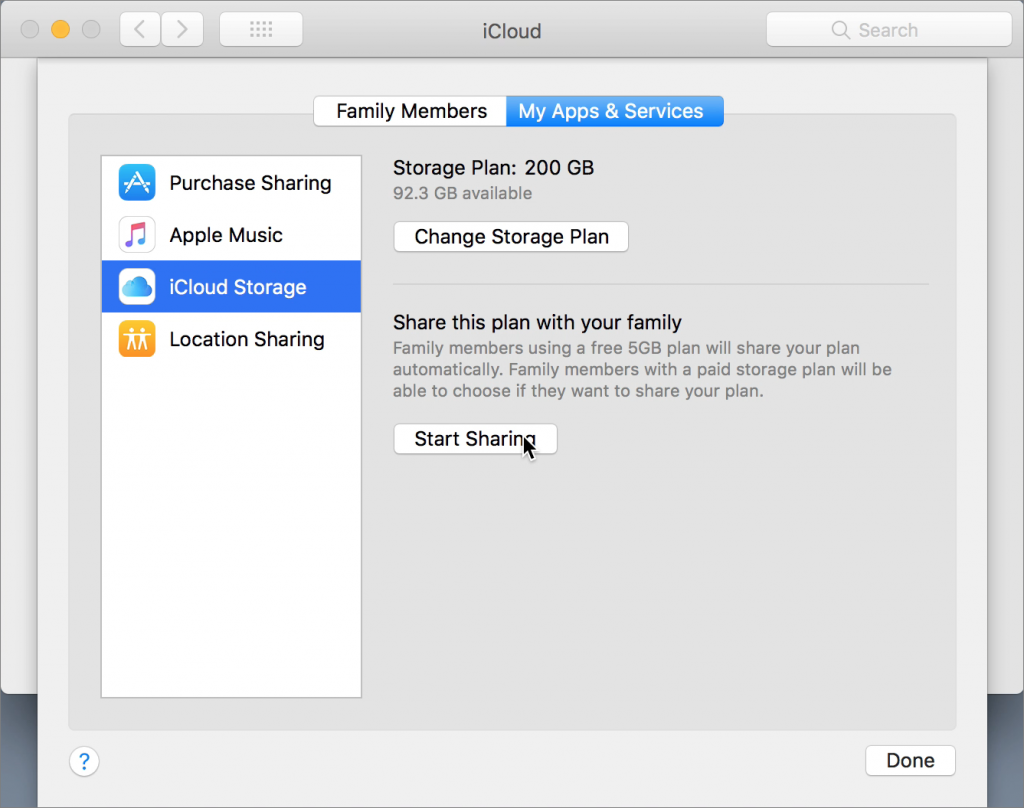
We’re happy to report that Apple has now made it so everyone in a Family Sharing group can share a single 200 GB ($2.99 per month) or 2 TB ($9.99 per month) plan.
The family organizer can start sharing storage in High Sierra or iOS 11 as follows: on the Mac, go to System Preferences > iCloud > Manage Family > My Apps & Services > iCloud Storage; in iOS, go to Settings > Your Name > Family Sharing > iCloud Storage. Any other family member can then cancel their paid plan and join the Family Sharing plan using their iCloud Storage screen. We think this is going to be a much better fit for many!
How to Get Back to Siri’s Web Results Quickly
Ask Siri to search the Web and you’ll get five results back from Google (not Bing anymore!). Tap one and it opens in Safari. But what if that page doesn’t contain the information you want? How do you get back to Siri’s results?
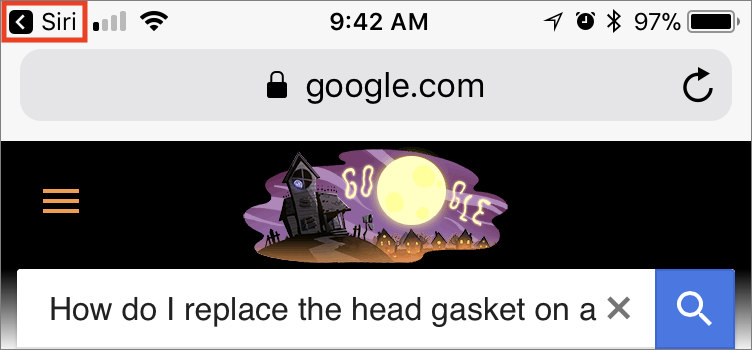
The easiest way is to tap the little Siri button that appears in the top-left of the screen or just activate Siri again, but instead of speaking, swipe down on the screen until “What can I help you with?†disappears and your recent Siri queries appear with your last search results in view. We hope this helps!Â
We help people with Apple technology.

