Blog
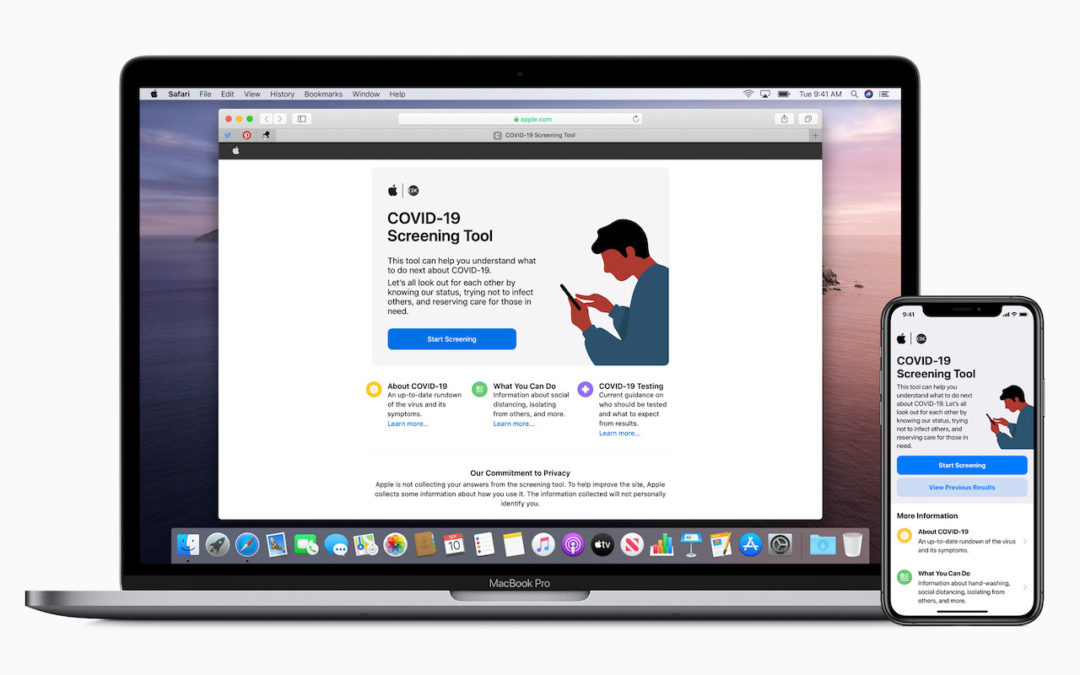
Apple Release COVID-19 Screening Tool App and Web Site
In partnership with the US Centers for Disease Control, Apple has released a free COVID-19 Screening Tool iOS app and nearly identical Web site. The interactive screening tool poses a series of questions about symptoms, risk factors, and recent exposure. Then it offers customized CDC recommendations, including guidance on social distancing and self-isolating, how to monitor symptoms, whether or not a test is recommended, and when to contact a medical provider. In addition, the app and Web site provide useful information about COVID-19, advice about how to keep yourself safe, and details on what to expect from testing. There’s nothing here that the CDC and other health agencies haven’t published elsewhere, but the screening tool can provide some peace of mind and reduce unnecessary load on overworked healthcare providers.

13 Essential Trackpad Tricks for Mac Users
A trackpad is not a mouse. In some ways, that’s obvious—you swipe your fingers on it, rather than dragging it around. Less obvious, however, are the many gestures that make using a trackpad on your Mac faster and more fun. These gestures aren’t limited to laptop users, thanks to Apple’s Magic Trackpad 2, which brings gesturing goodness to any desktop Mac. Here’s how to put your fingers to work.
Four Fingers on the Trackpad
The four-fingers-down gestures are dramatic and an easy way to appreciate the power of trackpad gestures, so we’ll start with them.
Say you have a lot of windows open, and you want to move them all aside quickly so you can open a file on the Desktop. Place your thumb and three fingers together on your trackpad and then spread them outward. Your windows scurry to the edges of the screen. To bring the windows back, reverse the gesture, pinching your fingers in toward your palm.

If you haven’t moved windows aside, pinching your thumb and three fingers together instead opens Launchpad, which shows icons for installed apps. Click an icon to open that app, or use the spreading four-fingered gesture to exit Launchpad.
Three Fingers on the Trackpad
Move three fingers horizontally on your trackpad and either nothing will happen, or you’ll switch to a different “desktop space.†This state of affairs is most easily seen by making an app full-screen. For instance, open Safari and click the green full-screen button at the upper left of the window. Safari takes over the entire screen, including the menu bar (to put it back, hover the pointer at the very top of the screen to see and click the green button again).
Now swipe left and right horizontally to switch in and out of the Safari space. As you make more apps full-screen, they’ll each create their own space. (If you’ve enabled Apple’s Dashboard, you may see it at the far left.)
What if you swipe vertically with three fingers? Swipe up to enter the All Windows view of Mission Control, which shows all open windows as thumbnails, plus desktop spaces in the top bar. Click any thumbnail to switch to it, or jump to any space by clicking it. You can also click the plus button at the upper right or drag any window into the top bar to create a new space. To move a space’s apps back to the current space, hover over a space on the top bar and click the close ![]()  button that appears. To exit All Windows view, swipe down with three fingers.
 button that appears. To exit All Windows view, swipe down with three fingers.
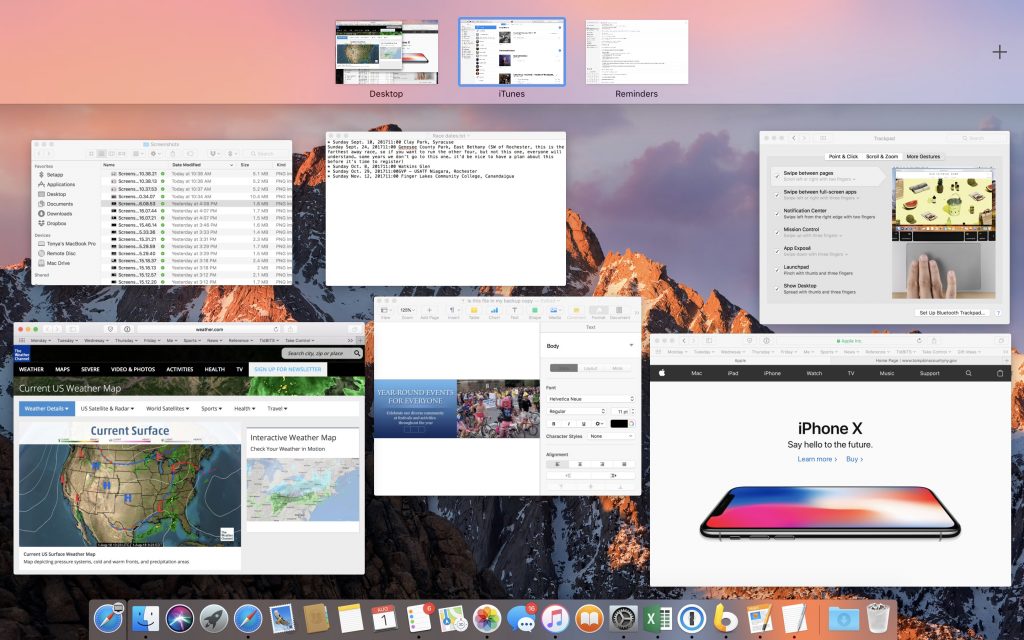
If you haven’t invoked All Windows view, swiping down with three fingers instead invokes App Exposé view, which displays thumbnails of all open windows in the current app. Click any one to switch to it. Swipe right or left with three fingers while in App Exposé to switch between apps.
Finally, on older MacBooks that don’t have Force Touch-capable trackpads, tap with three fingers on words to look them up, on files to preview them with Quick Look, and more. With newer MacBooks, if you have “Force Click and haptic feedback†enabled in System Preferences > Trackpad > Point & Click, you can instead “force click†with one finger for these features. That involves clicking on something and then pressing firmly without letting up.
Two Fingers on the Trackpad
The two-fingered gestures are easy to get your head around:
- In Safari, swipe left on a page to go back in that tab’s page history or right to go forward.
- Also in Safari, tap two fingers on the trackpad to zoom in on the content. Another two-fingered tap zooms back out.
- In Photos, and some graphics apps, zoom in and out by pinching with two fingers, and rotate selected objects by putting two fingers on the trackpad and turning them. A two-finger pinch also zooms the page in Safari.
- To open Notification Center quickly, swipe left from off the right-hand edge of your trackpad. Swipe back to the right to close Notification Center.
Changing Your Preferences
If you need a refresher on all these gestures, open System Preferences > Trackpad. Look in the Point & Click, Scroll & Zoom, and More Gestures panes to see a video for each gesture. You can also adjust which ones are active and how many fingers they require.
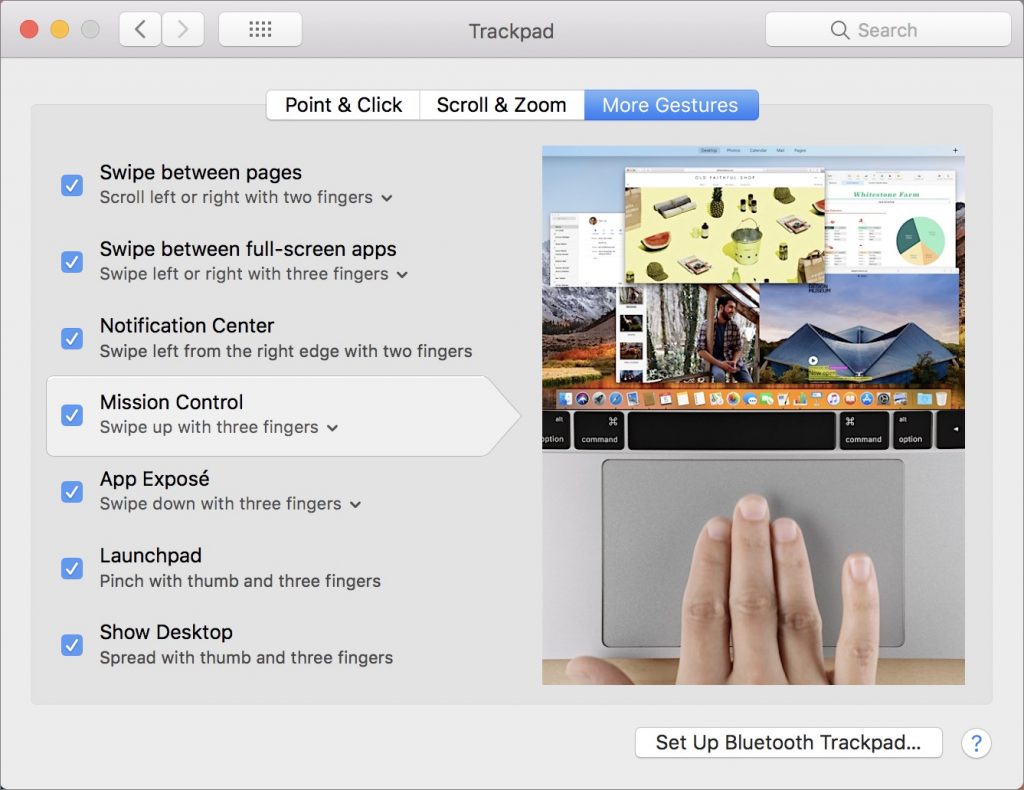
With so many gestures on offer, it’s worth your time to explore everything you can do with your trackpad.

The Importance of “Find My iPhone”
On the face of it, Apple’s Find My iPhone feature does what it says. If you lose your iPhone, you can identify its last known location by looking in the Find iPhone app or on the iCloud Web site, and you can make it play a sound. It’s great for tracking down a missing iPhone, whether you misplaced it in the house or left it behind at a restaurant.
But Find My iPhone does much more! For starters, it works with nearly any Apple device. You can use it to locate a missing Mac, iPad, iPod touch, Apple Watch, and even AirPods. Find My iPhone also helps protect your data if a device is stolen. It even works with Family Sharing to locate devices owned by anyone in your family—a boon to any parent with a forgetful teenager.
You must turn on Find My iPhone before your device goes missing!
- In iOS, tap Settings > Your Name > iCloud > Find My iPhone and enable Find My iPhone. (On the iPad, it’s called Find My iPad.) Also on that screen, turn on Send Last Location. Finally, go back to the main level of Settings, tap Privacy > Location Services, and make sure Location Services is turned on.
- On the Mac, open System Preferences > iCloud and select the Find My Mac checkbox—if you see a Details button beside Find My Mac, click it and follow its instructions for setting necessary preferences.
Be sure to practice viewing where your devices are located and playing tones on them so you’ll know what to do if a device goes missing.
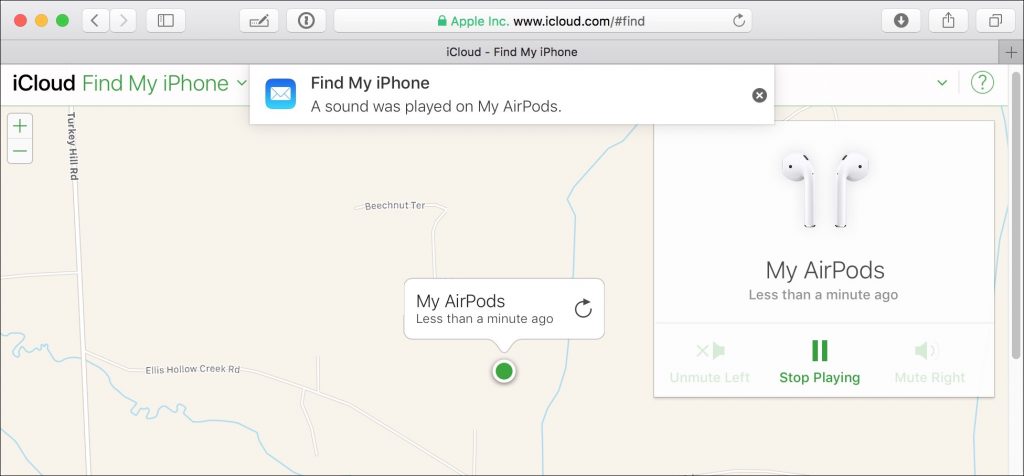
Find My iPhone has a few tricks up its sleeve for when you want a device to show a message or if you think it was stolen:
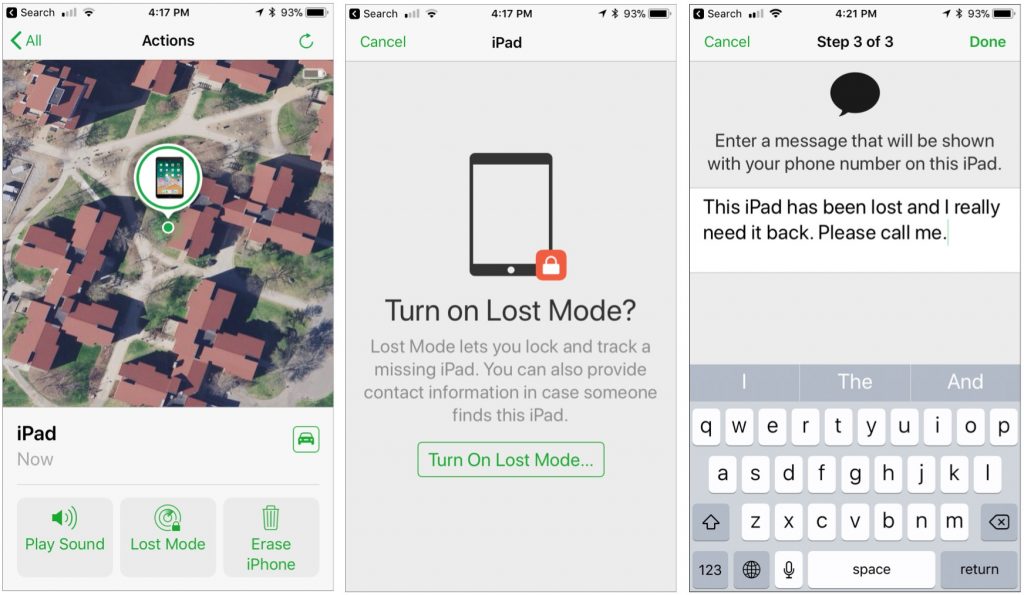
- Lost Mode: When invoking this mode for an iOS device or Apple Watch, you’ll be asked to enter a phone number where you can be reached and a message. After that, Lost Mode will kick in as soon as the device is awake and has an Internet connection. Anyone who tries to use the device will see your message along with a place to enter the device’s passcode. If you get it back, you can enter the passcode to dismiss the message and use it normally.
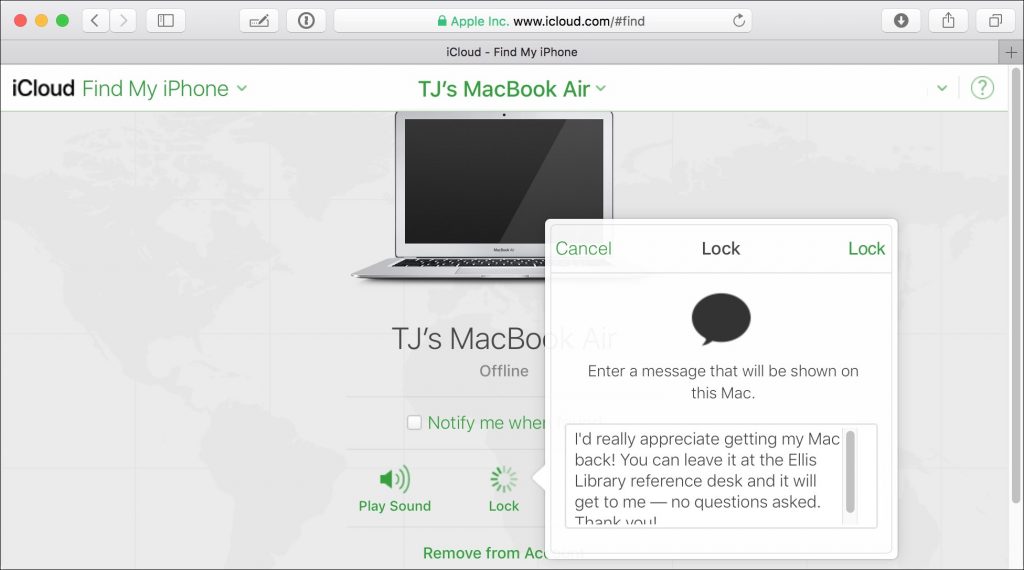
- Lock: Available only for the Mac, the Lock feature enables you to protect an entire Mac with a 4-digit custom passcode. You can also enter a message that will appear on the Lock screen. This is a good choice if you think you’ll get your Mac back but would prefer that nobody mess with it in the meantime. Note that if you lock a Mac, you can’t erase it, as discussed next, so lock it only if you think it can be recovered.
- Erase: Even if your device has an excellent passcode or password, you might worry that a thief will access your data. Fortunately, you can erase your device. Erasing a device makes it impossible for you to see its location in Find My iPhone, so it’s a last-ditch effort.
- Activation Lock: If the stolen device is an iOS device or an Apple Watch, when you turn on Find My iPhone, you also enable Activation Lock. This feature prevents someone who has your passcode but doesn’t know your Apple ID and password from turning off Find My iPhone, erasing the device, or setting it up for a new user. In other words, Activation Lock makes it so there’s little reason to steal an iOS device or Apple Watch, since the stolen device can’t ever be used by anyone else. If you get the device back, you can restore your backup—you do have a backup, right?
Find My iPhone works only while the device has power, so if you think you’ve mislaid a device, try locating it right away, before the battery runs out. But even if you are unable to retrieve a lost device, you can prevent others from accessing your data or taking over the device.

Recover Space on Your Phone by Offloading Unused Apps in iOS 11
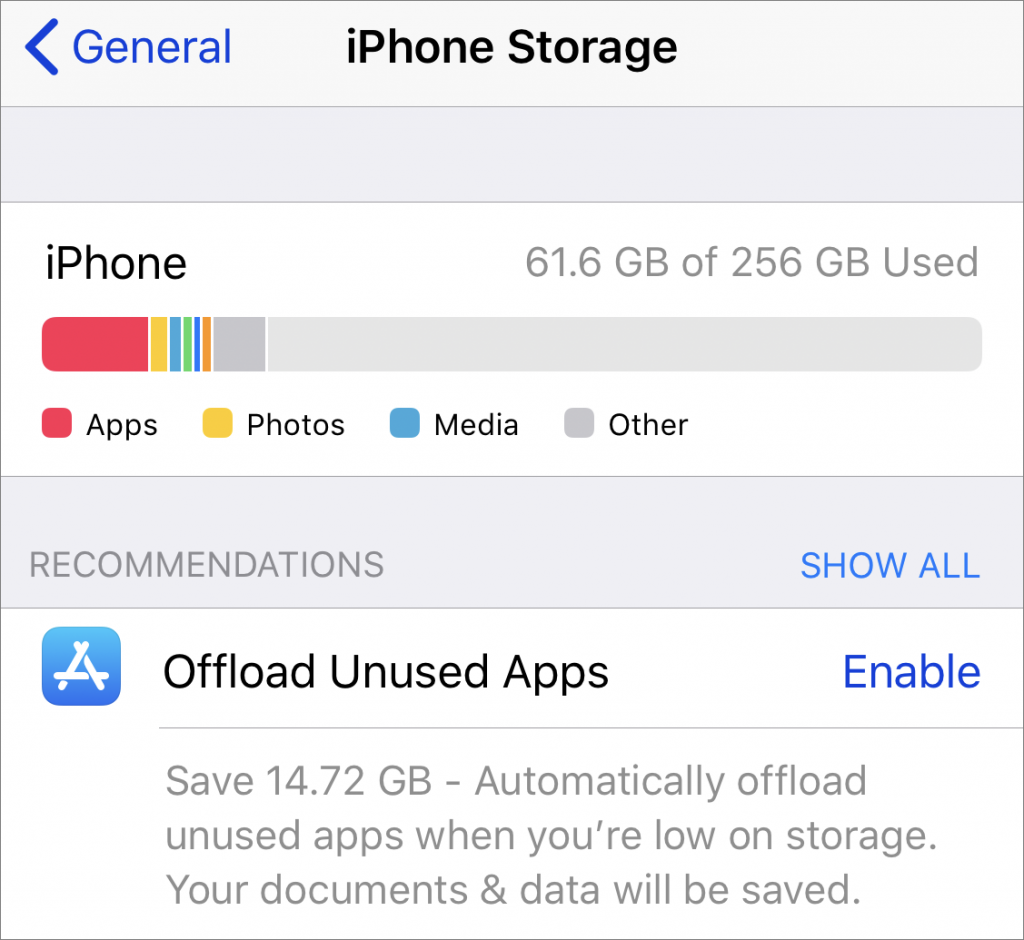
Running low on space on your iPhone or iPad in iOS 11? This problem may be easier to deal with than you expect because Apple has added a quick way to free up storage space by removing unneeded apps. Go to Settings > General > iPhone/iPad Storage, where you’ll see a Recommendations section. This section may include an option to Offload Unused Apps with an estimate of how much space you could save. Tap Enable to allow iOS to remove apps that you haven’t launched in a while—this happens only if you’re low on space. iOS preserves any documents or data associated with the offloaded app, and the app’s icon remains on the Home screen, with a cloud badge. Tapping the app icon reloads it from the App Store, assuming it’s still available. If you find yourself waiting for apps to reload often and you can clear space in other ways, you can disable the feature in Settings > iTunes & App Store > Offload Unused Apps.

Using Apple’s Messages in iCloud Feature
When Apple first announced macOS 10.13 High Sierra and iOS 11, one of the promised features was Messages in iCloud, a way of syncing your conversations in Messages via your iCloud account. Despite the fact that Messages already tries to sync its conversations between your devices, this feature proved difficult for Apple to deliver, and it didn’t appear until the recently released macOS 10.3.5 and iOS 11.4.
The idea behind Messages in iCloud is that it, as the name suggests, stores your conversations and their attachments in your iCloud account, rather than on each device individually. That’s a win because it can offload non-trivial amounts of data to iCloud, freeing up more space on that 16 GB iPhone.
Because the primary source of Messages data is in iCloud, the conversations should also sync perfectly and more quickly than in the past, something that was often frustrating when conversations didn’t quite match up across device. (iOS 11.4 also fixes a bug that could cause some messages to appear out of order.) Even better, deleting a conversation or attachment on one of your devices deletes it from all of them.
The main thing to be aware of before enabling Messages in iCloud is that it does count against your iCloud storage space. That said, if you back up your iOS devices to iCloud, removing Messages data from each device—such as your iPad and iPhone—and storing a single copy in iCloud should result in less overall iCloud usage. (And, realistically, if Messages in iCloud would make you need a higher tier of iCloud storage, you were probably going to need to upgrade soon for other reasons anyway.)
Enabling Messages in iCloud is simple.
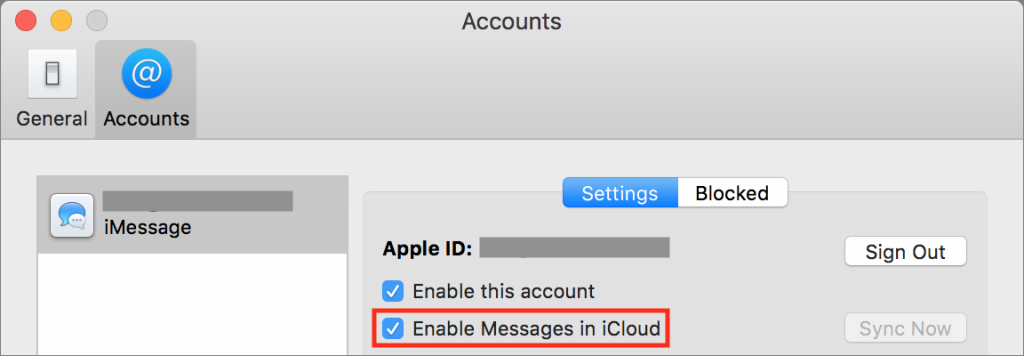
- On the Mac, open Messages > Preferences > Accounts and select the Enable Messages in iCloud checkbox.
- In iOS, go to Settings > Your Name > iCloud, and turn on Messages.
There are three quirks to be aware of:
- You won’t be able to enable Messages in iCloud unless you’ve enabled two-factor authentication for the Apple ID associated with your iCloud account. It’s a good idea for security reasons anyway!
- On the Mac, in the Messages account preferences, there’s a Sync Now button you can click if, for some reason, Messages hasn’t synced automatically. We don’t yet know if or when that will be necessary.
- When you first enable Messages in iCloud in iOS, you may see a note at the bottom of the screen saying that uploading to iCloud requires the device to be plugged in and connected to Wi-Fi. That’s necessary only for the first big upload.

Should you wish to turn off Messages in iCloud, be aware that it may take some time for each device to download all the messages.
For most people, Messages in iCloud is a no-brainer. Its syncing works the way you’d expect, complete with quick updates and universal removal of deleted conversations. The main reason you might not want to enable the feature is if you have only the free 5 GB of iCloud storage and aren’t interested in paying for more space.
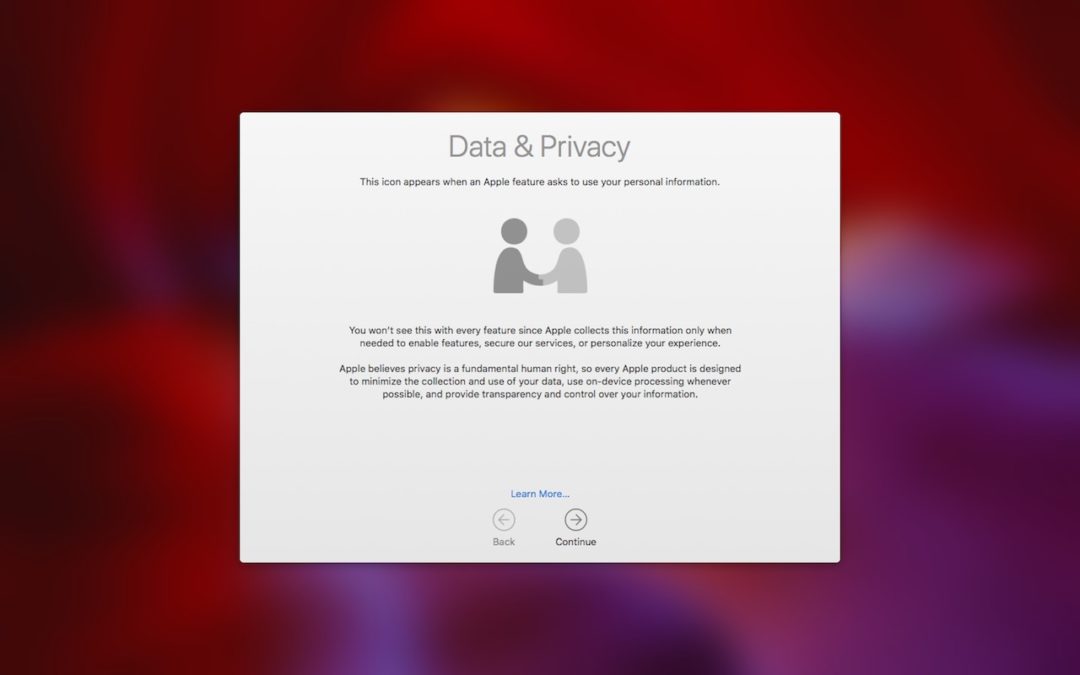
How Apple protects your private information
There’s an Internet saying: “If you’re not the customer, you’re the product.†The point is that, if you’re getting a service for free, the company providing it sees you not as a customer, but as a product to sell, generally to advertisers.
This is how Google, Facebook, and Twitter operate. They provide services for free, collect data about you, and make money by showing you ads. In theory, the more that advertisers know about you, the better they can target ads to you, and the more likely you’ll be to buy. Personalized advertising can seem creepy (or clueless, when it fails), but it isn’t inherently evil, and we’re not suggesting that you stop using ad-supported services.
This ad-driven approach stands in stark contrast to how Apple does business. Apple makes most of its money by selling hardware—iPhones, Macs, and iPads, primarily. Another big chunk of Apple’s revenue comes from App Store and iTunes Store sales, iCloud subscriptions, and Apple Pay fees. Knowing more about you, what Web pages you visit, what you buy, and who you’re friends with doesn’t help Apple’s business, and on its Privacy page, Apple says bluntly, “We believe privacy is a fundamental human right.â€
Of course, once your data is out there, it can be lost or stolen—in June 2018, a security researcher discovered that the online data broker Exactis was exposing a database containing 340 million records of data on hundreds of millions of American adults. Ouch!
Let’s look at a few of the ways that Apple protects your privacy.
Siri and Dictation
 The longer you use Siri and Dictation, the better they work, thanks to your devices transmitting data back to Apple for analysis. However, Apple creates a random identifier for your data rather than associating the information with your Apple ID, and if you reset Siri by turning it off and back on, you’ll get a new random identifier. Whenever possible, Apple keeps Siri functionality on your device, so if you search for a photo by location or get suggestions after a search, those results come from local data only.
Touch ID and Face ID
 When you register your fingerprints with Touch ID or train Face ID to recognize your face, it’s reasonable to worry about that information being stored where attackers—or some government agency—could access it and use it for nefarious purposes. Apple was concerned about that too, so these systems don’t store images of your fingerprints or face, but instead mathematical signatures based on them. Those signatures are kept only locally, in the Secure Enclave security coprocessor that’s part of the CPU of the iPhone and iPad—and on Touch ID-equipped laptops—in such a way that the images can’t be reverse engineered from the signatures.
And, of course, a major goal of Touch ID and Face ID is to prevent someone from violating your privacy by accessing your device directly.
Health and Fitness
 People with medical conditions can be concerned about health information impacting health insurance bills or a potential employer’s hiring decision. To assuage that worry, Apple lets you choose what information ends up in Health app, and once it’s there, encrypts it whenever your iPhone is locked. Plus, any Health data that’s backed up to iCloud is encrypted both in transit and when it’s stored on Apple’s servers.
App Store Guidelines
 A linchpin in Apple’s approach to privacy is its control over the App Store. Since developers must submit apps to Apple for approval, Apple can enforce stringent guidelines that specify how apps can ask for access to your data (location, photos, contacts, etc.). This isn’t a blanket protection—for instance, if you allow a social media app <cough>Facebook<cough> to access your contacts and location, the company behind that app will get lots of data on your whereabouts and can even cross-reference that with the locations of everyone in your contact list who also uses the service.
In the end, only you can decide how much information you want to share with the likes of Google, Facebook, and Twitter, and only you can determine if or when their use of your details feels like an invasion of privacy. But by using Apple products and services, you can be certain that the company that could know more about you than any other is actively trying to protect your privacy.
Ask a Tech
Question: I received a notice that I need to update my Backblaze backup software. Is this something I can do myself?

Answer: Backblaze is the offsite backup software that we use and recommend. It’s terrific in a number of ways: It encrypts your data before uploading it, it will back up unlimited data per Mac, and it starts at just $5 a month.
One thing it doesn’t do well (yet) is update itself. For reasons passing understanding, when Backblaze has a new update, you have to go to their web site and re-download the whole program. These are instructions on exactly how to do that.
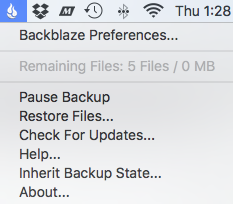
First go to the Backblaze menu and select “Check For Updates…â€
If there’s a backup available, you’ll get a box that looks like this. Obviously, you’ll click the “Download†button
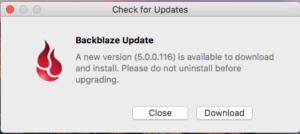
Unbelievably, this does NOT begin a file downloading, but instead takes you to the Backblaze website where you’ll need to click on the link that says Download for Mac OS X. (Note that the version numbers will probably be different than in this example.)

Next, you want to go to your Downloads folder where you can find the “Install_backblaze.dmgâ€
![]()
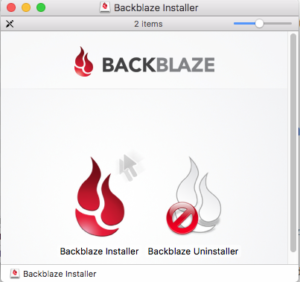
After you’ve double-clicked the DMG file to open the Backblaze installer, you’ll see two files: Backblaze Installer and Backblaze Uninstaller. There’s no need to run the Uninstaller prior to installing the new version. Just double click Backblaze Installer to start installing the new version.
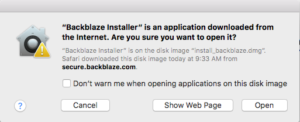
macOS X is pretty cautious when it comes to running software downloaded from the Internet. You’ll need to click “Open†to approve launching the Backblaze installer.
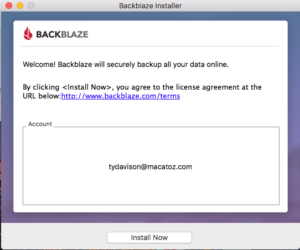
Finally we come to the part where we can start up the installer. Click the “Install Now†button at the bottom of this screen:
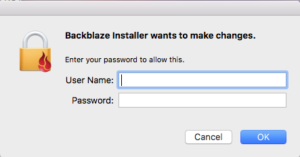
macOS X also requires that you authenticate (enter the User Name and password for an administrative account) on your Mac:
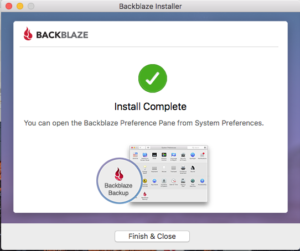
Finally, we’re done:
We help people with Apple technology.

